 Photisan
Why Photisan gets more sharpness out of your RAW files
Every RAW file arrives a little soft: the lens, the sensor and the color reconstruction see to that. This is how Photisan gets that sharpness back without halos or noise, with a formula from 1972 and a lot of work around it.
Every RAW file arrives a little soft, even if you nailed the focus. Before you see the photo, three things have already taken sharpness away. The lens, because none of them brings a point of light to an exact point, and nearly all are softer in the corners than in the center. The filters in front of the sensor, which on many cameras spread the light a little between neighboring pixels on purpose, to avoid moiré. And the mosaic: each pixel on the sensor records a single color, and the other two have to be guessed.
The usual remedy is sharpening, which raises the contrast at edges. It works up to a point, because it doesn't recover detail: it exaggerates the edges that are already there. Push it and bright halos appear around dark things, and the noise grows along with everything else. In Photisan we take the problem in a different order: lose less detail first, then give back what was lost, and only at the end, if you want, sharpen.
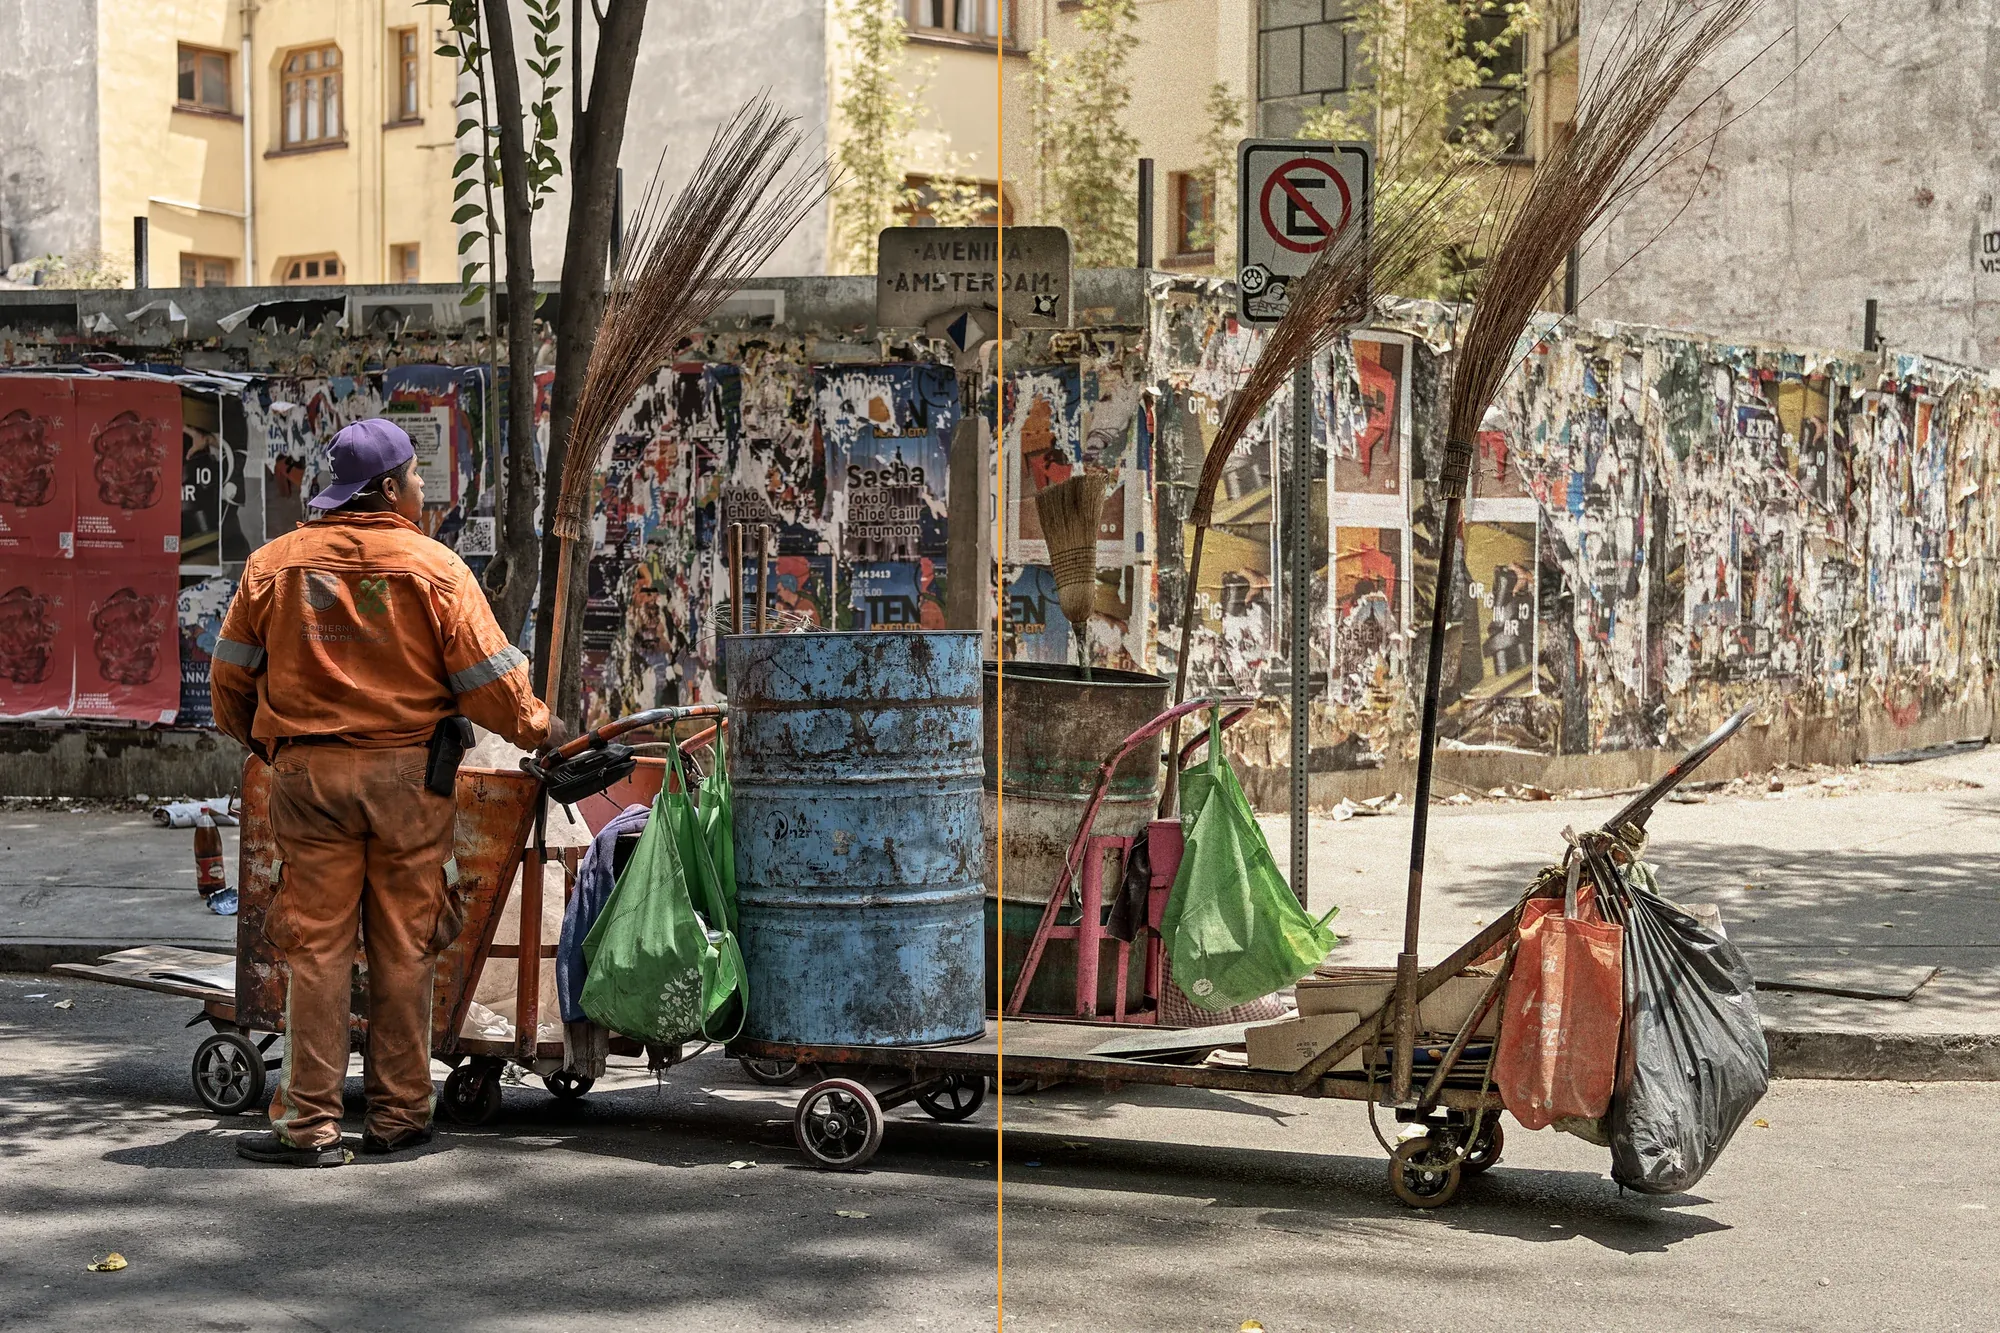
On the cover, the same detail of a RAW file from a Fujifilm X-T4 at 200%: on the left, developed in another program; on the right, in Photisan.
Losing less when rebuilding color
On a Bayer sensor, half the pixels see green, a quarter red and a quarter blue. On Fujifilm's X-Trans the pattern is different and less regular. Filling in the colors each pixel is missing is called demosaicing, and it's the first place sharpness gets lost: if the program averages without looking, it wipes out fine detail; if it guesses wrong, it invents colors that weren't there, like the rainbow that shows up on finely woven fabric.
Photisan uses its own algorithm for Bayer and for X-Trans. The general idea is to look at which way the detail runs at each point and fill in along it, not across it. Red and blue are rebuilt from their difference to green, which changes much more smoothly than the colors themselves. The photo's color doesn't change; what changes is how well the missing values are guessed. We measured it on real photos from which we removed colors on purpose, to compare the reconstruction with the truth, and it comes out with more detail and less false color than the methods we used before.
Measuring the blur on your own photo
To undo a blur you need to know how big it is, and Photisan measures it on each photo when it opens it. It looks for clean edges (a flat area, a step and another flat area) and checks how many pixels the step takes. A perfect edge would jump from one pixel to the next; a real one spreads over several. If the blur is shaped like a Gaussian bell, the edge's profile follows this curve, where σ is precisely the size of the blur:
E(x) = ½ · [1 + erf(x / (σ√2))]Out of the strongest edges it keeps the sharpest, because an edge can never be sharper than the lens left it: the softer ones are things out of focus or soft by nature. It measures the center and the corners separately, because nearly every lens gets softer toward the edges. And while it's at it, it measures the noise in the smooth areas, which will be needed.
Undoing the blur
A blur is a convolution: each point of light in the scene spreads into a small bell over the pixels around it. If you know the bell, you can try the way back, which is called deconvolution. Photisan uses the Richardson–Lucy method, published by William Richardson in 1972 and by Leon Lucy in 1974 with astronomical images in mind. Among other things, it was used to rescue the Hubble telescope's photos before its mirror was corrected.
It works by successive approximations. It starts with your photo as a first guess, blurs it with the measured bell and compares the result with what the camera recorded. Where the blurred guess comes out darker than the photo, it brightens it; where it comes out brighter, it darkens it. Then it goes around again. In one line:
u ← u · [(d / (u ∗ P)) ∗ P′]Here d is what the camera recorded, u the image being refined, P the bell of the blur, P′ the same bell flipped, and ∗ the convolution. The ratio is above 1 where light is missing and below 1 where there's too much. Since the correction multiplies instead of adding, the image never takes negative values, which would make no sense in a photo.
The hard part: noise and halos
The formula is the easy part. Applied as it is, Richardson–Lucy also tries to explain the noise as if it were detail, makes it grow with every round, and ripples and halos start to appear around strong edges. Almost all of our work goes into avoiding that:
- Before deconvolving, Photisan separates what is image from what the measured noise explains. It only refines the image; the noise goes back as it was, unsharpened.
- The correction slows down where the difference between the guess and the photo fits within the noise: there's nothing to recover there.
- Each pixel stays within the limits its neighbors set, which cuts halos off at the root.
- It only acts where the photo has more contrast than noise, so a smooth sky stays as it was.
- It works on brightness, not on color: hue and saturation don't change.
- It uses the center's bell in the center and the corners' bell in the corners, and what fits in between.
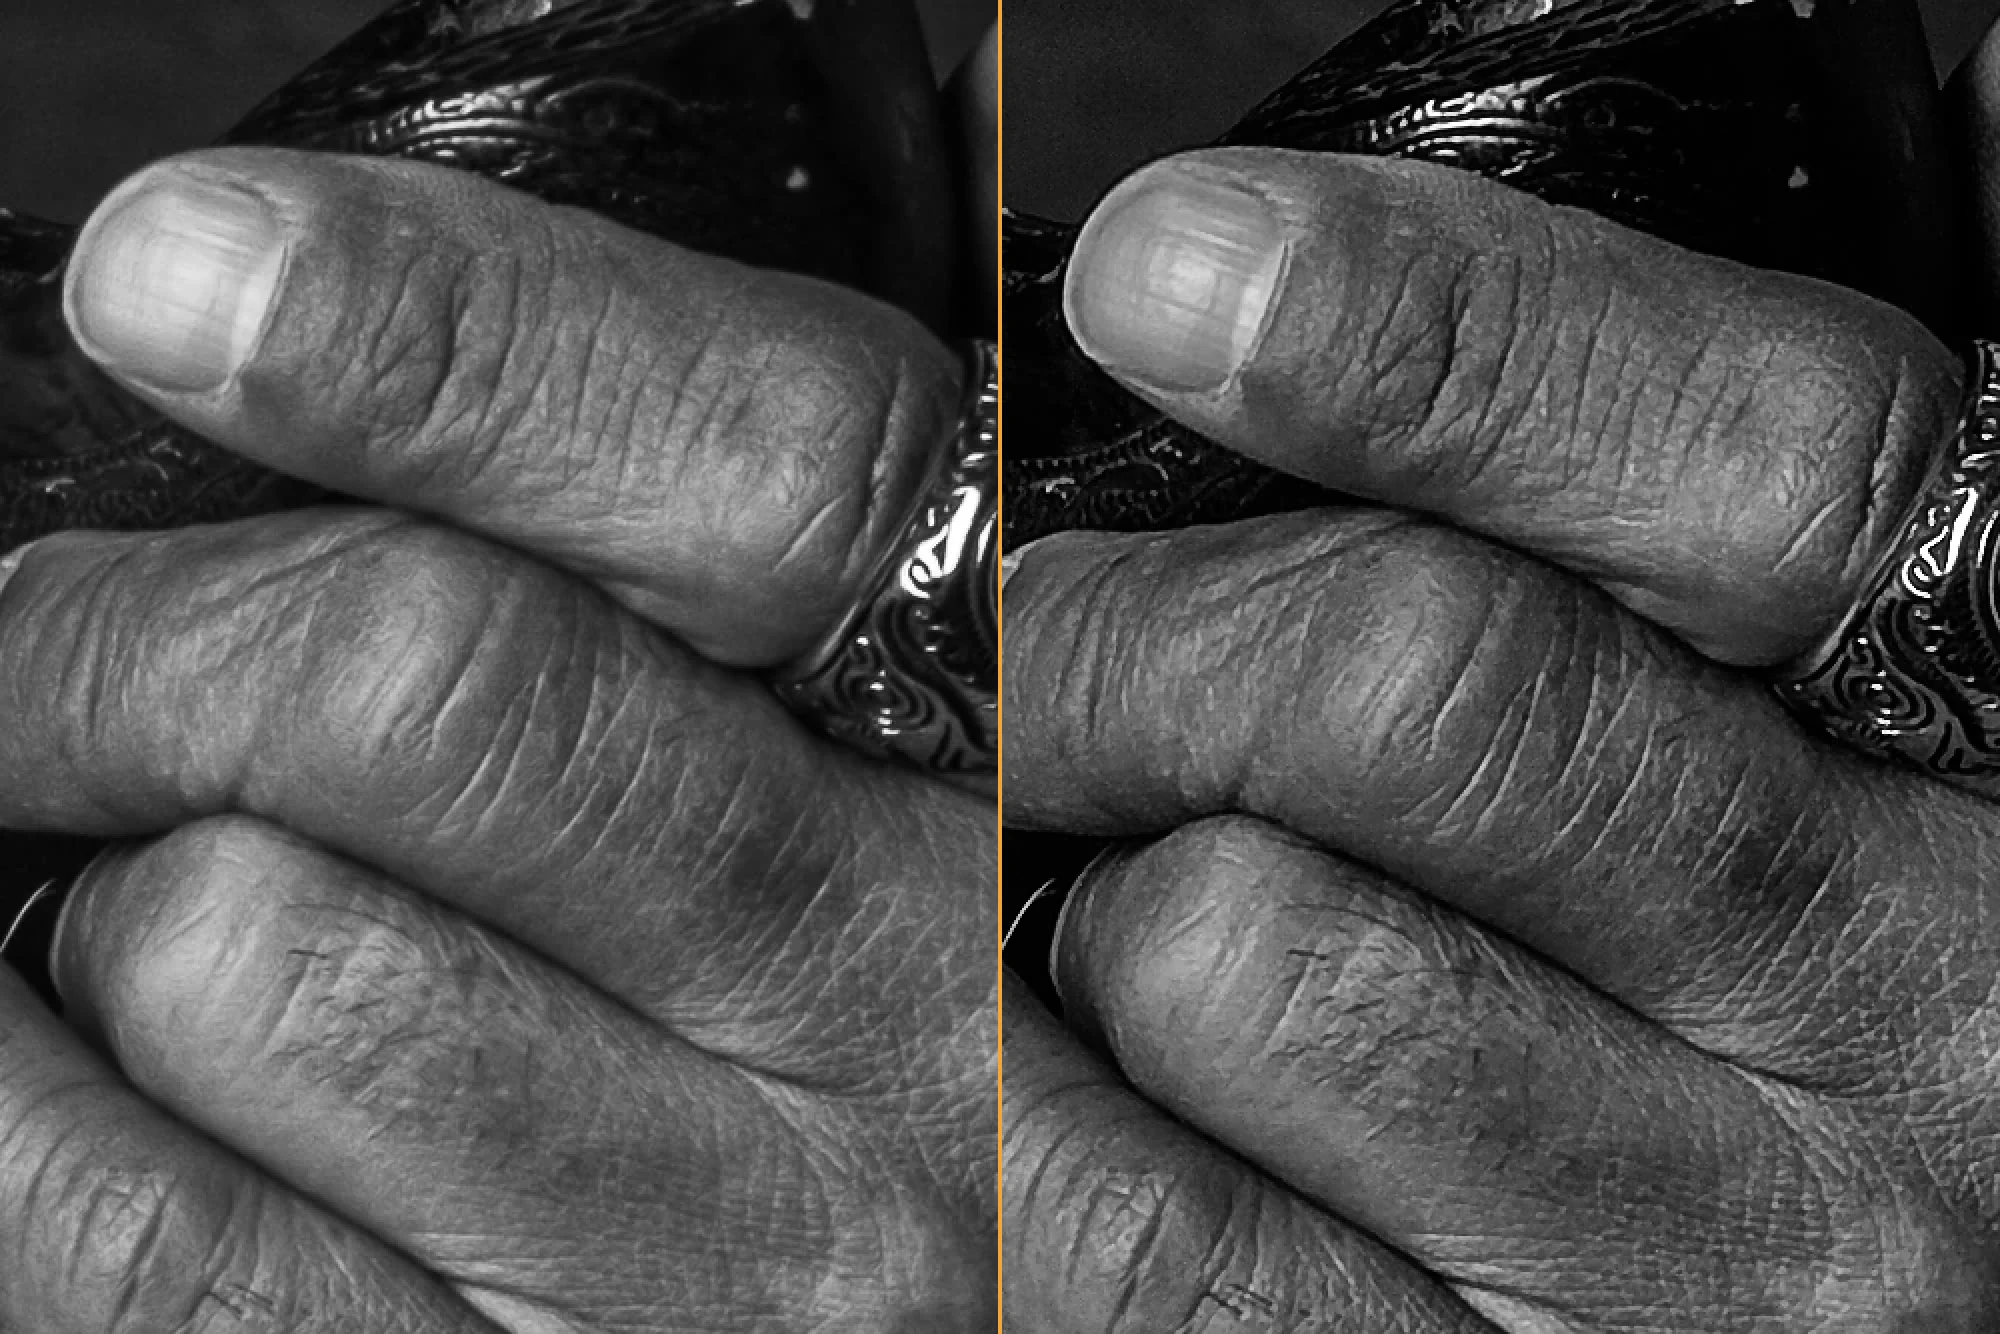
Developed in another program, at 100%.
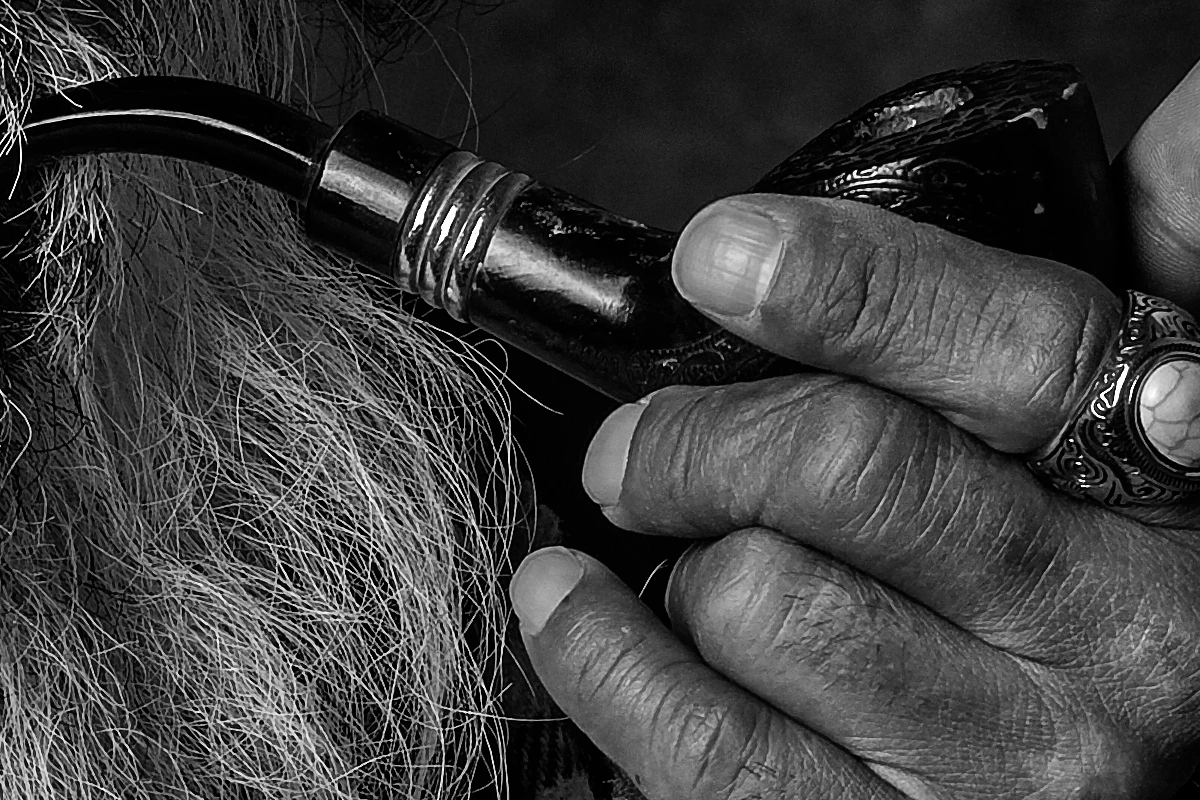
Developed in Photisan, at 100%: the engraving on the ring, the creases of the skin and the hairs of the beard, with no halos around them.
And at the end, the usual sharpening
Capture sharpening gives back what the photo already had. Classic sharpening stays where it was, on top, for when you want a crisper finish or you're preparing the photo for print or for the screen. They are two different things, and Photisan keeps them apart.
What we keep to ourselves
How many rounds the deconvolution takes, how we separate the image from the noise, where we put each limit and how the demosaicing decides which way the detail runs are our recipe. The formulas above, on the other hand, have been published for half a century; what's ours is everything around them that makes them work on real photos.
Try it
Open a RAW file and find the Detail section of the development. Capture sharpening at 100% is what was measured on your photo, and Capture radius on Auto uses the measured blur, larger toward the corners. Look at the photo at 100% with capture sharpening at 0 and at 100%, and then decide how much Sharpening you want on top. If you don't have Photisan yet, download it and try it for free.